7.30.2010

Thanks for being my friend

Hello!!

I have been dancing on air ALL morning! Why? Because of THIS! I am SO thrilled that I will be "working" (read - playing!) with Lisa!! THE Lisa Spangler! Her cards are always so fun and cheery and this is just SUCH an honor!!

Anyways, in case I'm boring you, I thought I'd share this weeks Stamp and Scrap challenge over at SSC...


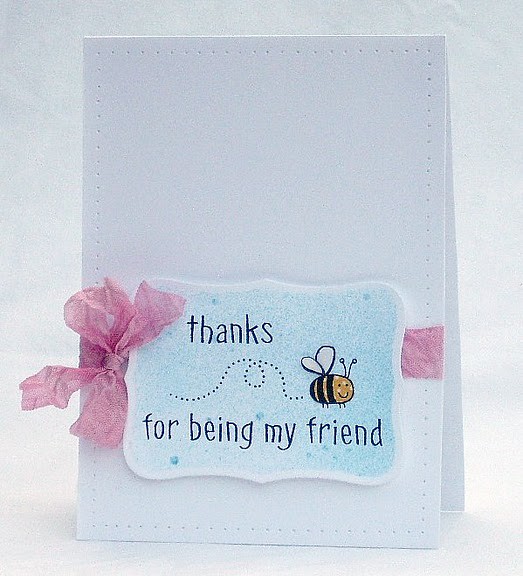
Instructions: Trim and score card base. Faux stitch near borders (or use sewing machine - I made this when my sewing machine was broken). Cut out piece of white scrap paper and cut out with die. Before separating die and paper, spray with mist and let dry. Once dry, separate die and paper, than stamp image and sentiment onto paper.Stamp image onto patterned paper, and than onto another piece of white scrap paper, than cut out and piece together. Tie bow around base, and than adhere embellished die cut using foam squares.

Only fitting to showcase some Hero Arts stamps today - this company and community has made a tremendous impact on my cardmaking. The kind words, sweet comments and notes of encouragement from the Flickr gals helped me SO much - if you are a part of the community, you know how truly awesome it is. :) So thanks Hero Arts, for being my friend. :)

Have an awesome weekend. :)

**************************
Being my friend card recipe
Cardstock: Darice
Patterned paper: October Afternoon "Fly a Kite"
Stamps: Hero Arts "Be happy"
Ink: Staz-on
Ribbon: Seam binding available HERE
Other: Tattered Angels glimmer mist, nail polish (for shine on bee wings)

Tools: trimmer, scissors, adhesive, foam squares, pin, Nestabilities, Cuttlebug

7.27.2010

Congratulations

Hello!

I posted this on Flickr awhile ago, but forgot to post it here; a sweet baby card, which might've been made for an SSC challenge awhile back, but I do these so far ahead, and I design for two groups, that I forget a few times! ;)


For the polka dot background, it might look rather crummy as I didn't have that embossing folder, and so I poked those holes using my handy-dandy stylus.

Instructions: Trim card base and stamp background. Lightly ink doily and fold for a vintage feel, than adhere to card base. Tie bow and attach charm. Cut out kraft paper using die and emboss with stylus. Lightly ink polka dot pattern, than stamp sentiment. Stamp image onto separate piece of kraft, and trim. Adhere to kraft die cut using foam squares. Adhere embellished die cut to card base using foam squares, and top off with small half pearl on elephants eye.

Thanks for stopping in and have a fabulous day!

****************************
Card recipe
Cardstock: Bazzil
Stamps: Hero Arts "Elephants" and Grid stamp, Sugarloaf sentiment
Ink: Colorbox
Ribbon: Hug Snug
Half pearl: Basic Grey
Other: doily, charm

Tools: trimmer, adhesive, foam squares, scissors

7.24.2010

Be happy

Hi there!
A card for the EBTKS challenge - a sketch challenge, which is perfect, as I have been in desperate need of sketches with my mojo rather low.
So with the sketch, and a little inspiration from our newest Hero Arts hostesses (congrats again, ladies!), I made this simple card....


Instructions: Trim card base and score. Cut out patterned paper and sew near edge. Adhere to base, and than, using a strip of tape to hold it down, ruffle a long strip of tissue paper down the card base on top of the patterned paper. Next, cut out die, and spray with mist. Stamp image onto die, than stamp image onto white paper. Color and cut out image in white paper, than adhere to die cut using foam squares. Adhere die cut to base, and stamp sentiment near the bottom. Distress lightly with ink pad.

I don't really color images that often, as I like to paper piece more, but I decided to throw caution to the wind for this card (you can tell I'm really bold, right? ;)). Used some plain ol' colored pencils and finished this card lickety split. And the thing that made ME really happy was that the "b" in the sentiment didn't come out blotchy like it did on my last card - yay!
Oh, and one more thing; I was blog hopping, when I discovered THIS set from Hero Arts - another one for the wishlist!

Thanks for stopping in!

**************************
Card recipe
Cardstock: Darice
Patterned paper: Girls Paperie
Stamp: Hero Arts "Be Happy"
Ink: Staz-on
Other: colored pencils, thread, tissue paper, glimmer mist

Tools: trimmer, adhesive, foam squares, Cuttlebug, Nestabilities, sewing machine

7.22.2010

Hi!

Hi there!
Thanks for all the sweet comments yesterday! :) For those who missed the notice at the end, the ribbon I used yesterday is available HERE.

I have an SSC card to share with you today; the challenge was to focus on the sentiment, and you can join in on the fun HERE.


Instructions: Cut out card base, and than patterned paper using dies. Lightly brush ink pad against edges of card base and patterned paper. Adhere dies to base using foam squares. Add letters on top of patterned paper. Tie twine around top of card base. Distress edges with ink

Pretty simple card recipe; and speaking of recipes, I finally got a recipe from a friend of mine for Peanut Butter Chocolate Chip Cookies - and these aren't your average PBCC cookies, either! I wish I could share the recipe, but I am the only person outside her family that has this recipe, so I'll have to ask her before I share.
Do you have any secret family recipes?  - I'd love to hear the names! I'm in hungry mood right now. ;)

Thanks for popping in!

*****************************
Hi! card recipe
Cardstock: Bazzil
Patterned paper: October Afternoon "Fly A Kite"
Letters: Making Memories
Ink: Colorbox
Other: twine

Tools: trimmer, scissors, Nestabilities, Cuttlebug, adhesive, foam squares

7.20.2010

Thinking pretty

Hi there!

Thanks for all the kind, encouraging comments yesterday - you know us bloggers, we depend upon them! ;)

Today, I have another 2 Sketches 4 You card - more sewing! Not quite as crazy though. ;) Finally got some of the highly praised Girls Paperie paper, and on MAJOR discount, thanks to my friend Judy. 


I always liked frame stamps, but my budget doesn't really allow for them, so I made my own...


Instructions: Trim and score card base, and cut out patterned papers. Sew papers to base. Cut out white die using Nestabilties, stamp grid image, and lightly distress with ink. Stamp sentiment onto die. Stamp butterfly image onto reverse of polka dot paper and cut out. Adhere half pearls to centers and than attach to die. Cut out green die, distress, and adhere embellished white die on top. Adhere this to base. Tie bow twice and adhere flower - stick pin through bow. Distress edges of card with ink.

With the card deets out of the way, how do you like the new blog look? I'll have to update the banner, but I just had to use this background template. Plus, I haven't done anything with my blog in a long time, and I was getting bored. ;)

Thanks for popping in - have a great day!

***************************
Card recipe
Cardstock: Bazzil
Patterned paper: Girls Paperie, Michaels
Stamps: Hero Arts "Thinking of You messages" and Grid stamp, Martha Stewart
Ink: Colorbox
Ribbon: Hand-dyed; available HERE
Rose: Remembrance (Michaels)
Half pearls: Remembrance (Michaels)
Other: pin, thread

Tools: trimmer, adhesive, foam squares, sewing machine, Cuttlebug, Nestabilities

7.16.2010

Will you enjoy?

Hello there!

The sewing machine is working again! Oh frabjuous day, callooh, callay (I hope someone else knows what poem that is from ;))! It was out for a month or two - months of torture! ;) Anyways, I decided to make a card based off of this weeks 2 Sketches 4 You sketch, and went berserk with the sewing machine in my delight...


....and in the process went a little off the sketch. So, today, with a little bit of spare time, I pulled this together, following the sketch more closely....


Instructions #1: Trim card base and cut out patterned papers - sew: Cut out image and and black patterned paper with circle templates. Adhere sticker around black patterned paper circle, than adhere image on top. Sew around. Adhere to base, and add ribbon on top. Cut out small heart, and cover with nail polish (for shine). Adhere to image, and finish off with half pearls.

Instructions #2: Trim card base and cut out patterned paper. Adhere patterned paper to base, than pop out die cuts. Adhere die cuts to base. Stamp, cut out and frame sentiment, than adhere to base. Tie bow around base, cutting a slit near the score of the card for the ribbon to go through.

Not much else to share today - thanks for stopping in!


*************************************
Card #1 recipe
Cardstock: Darice, Bazzil
Patterned paper: October Afternoon "Fly a Kite" and "Thrift Shop", Crate Paper
Ribbon: American Crafts
Half pearls: Kaisercraft
Stickers: Making Memories

Tools: trimmer, scissors, sewing machine, adhesive


Card #2 recipe
Cardstock: Darice
Patterned paper: Crate
Stamp: Hero Arts "Tree, Birds and Messages"
Ink: Unknown
Die cuts: Crate
Ribbon: Offray


Tools: trimmer, scissors, adhesive

7.10.2010

{heart} hello

Hello!

Long time, no see, eh?
I had a fun time at the camp, though one of the gyms didn't have AC, and the temperature was 90+! Hope your week is coming along a bit cooler. ;)
A little card for you today, made using this weeks SSC Card challenge...


Instructions: Cut base and small hearts. Adhere lace onto card base; staple ends twice each. Stamp sentiment above lace; adhere hearts beside sentiment. 
Using brown ink pad, brush against brad tops; dry. Once brad tops are dry, cut off ends, and use foam squares to attach brads to side of card base. 
Distress edges with ink pad.

Not much else to share - hope to get back into the swing of things again soon and to stop by all my crafty friends blogs! Thanks for popping in and for all the sweet comments you leave - they make me smile! :)

*******************************
{heart}hello card recipe
Cardstock: Bazzil
Patterned paper: October Afternoon "Thrift Shop" and "Fly a Kite"
Stamp: Hero Arts "Tree, Birds and Messages"
Ink: Colorbox
Lace: American Crafts
Brads: Making Memories

Tools: trimmer, scissors, adhesive, Heidi Grace heart template, foam squares

7.05.2010

Polka dot elephant

Hi there!

I won't be blogging for a few short days as I'm heading on over to a camp, so I thought I'd quickly share this card I made a couple weeks ago...


Is it just me or do polka dots and elephants seem to go really well together? Then again, polka dots look nice with pretty much any animal image. ;)

Instructions: Trim and score card base, round edges. Stamp sentiment onto coral paper, and than stamp image twice onto green polka dot paper. Cut out and paper piece image, tie bow around trunk, than adhere to white paper. Adhere white paper to blue polka dot paper, and distress edges of white and patterned paper. Adhere heart sticker on white paper using a foam square. Adhere stamped sentiment paper onto base, and tie knot with ribbon around base. Add embellished center rectangle to base using foam squares. Distress edges of card base.

Enjoy your week and thanks for popping in! :)

***************************
Card recipe
Cardstock: Bazzil
Patterned paper: October Afternoon "Fly a Kite" and DCWV "Green" stack
Stamps: Hero Arts "Elephants"
Ink: Staz-on, Colorbox
Ribbon: Offray
Other: twine

Tools: trimmer, adhesive, foam squares, scissors

7.02.2010

Berry much

Hello!

Another quick post (seems like most of my posts are quick ones lately);


Instructions: Trim card base. Adhere letters to card base and sew. Add sticker using foam squares. Tie bow.

Quick post, quick card. 
Oh, and you get the pun, right? A few friends and family didn't catch it right away. ;)

Have an awesome weekend and thanks for stopping in - those comments really make me smile. :)

******************************
Berry much card recipe
Cardstock: Unknown
Letters: Making Memories
Sticker: October Afternoon
Ribbon: Hug Snug

Tools: trimmer, adhesive, foam squares, thread, sewing machine